User Guide
This guide covers the Papercut AI panel end to end - installing it, transcribing your footage, chatting your way to a cut, and placing it back into your Premiere Pro timeline. It assumes you already know how to edit. It does not assume you know Papercut AI.
Quick Start
- Install the panel and open it in Premiere Pro.
- Log in with your email, or sign in with your browser.
- Select your sequences and transcribe them.
- Tell the chat what cut you want.
- Generate the script, then create the sequence to place it.
On this page
- 01Install & open
- 02Log in
- 03Your media list
- 04Transcribe
- 05The viewer card
- 06The MAP tab
- 07Visual analysis / B-roll
- 08Chat with the editor
- 09The outline
- 10Generate
- 11Script cards
- 12Refine
- 13Search for clips
- 14Place into your timeline
- 15Settings & account
- 16Start over
- 17Report a bug
- 18Help
- 19Advanced
01 Install & open
Download the signed installer from papercutai.io/uxp. Pick the Mac or Windows build, run it, and leave the "Open with UPIA" option checked when the installer offers it. UPIA (the UXP Plugin Installer App) ships with Creative Cloud, so most editors already have it.
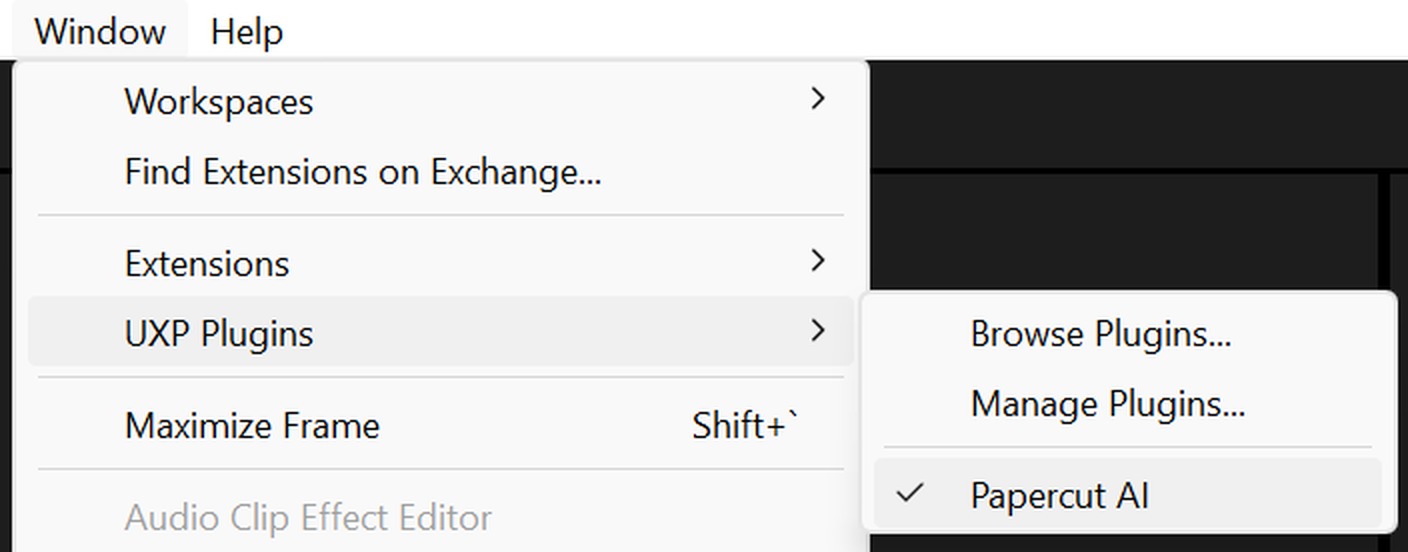
Papercut AI requires Premiere Pro 25.6 or later. Once installed, open the panel from Window > UXP Plugins > Papercut AI. It docks like any other Premiere panel.
Project setup. Papercut AI works in brand-new projects and in projects you've been living in for months - set up your project the way you normally would. It works with sequences and multicam sequences. If you have audio to sync, sync it into a sequence first. If there's nothing to sync, the fastest path is to select a clip or clips in the project panel and right-click New Sequence from Selection. Hours of content on one long sequence, or footage organized into subsequence chunks - both work fine.
Network shares work too. Projects and media on a NAS or a shared server are fine. And if you Save As to make a new version of your project, your transcripts come with it. You don't have to transcribe again.
02 Log in
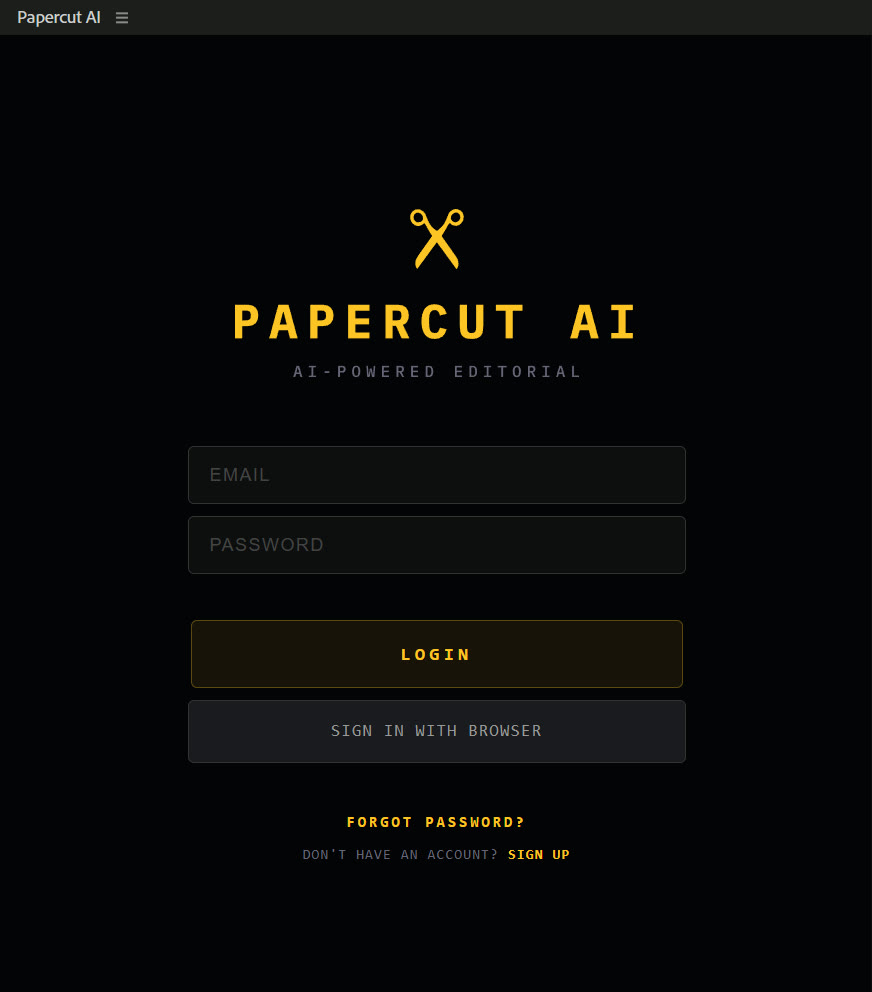
Log in with your email and password, or click SIGN IN WITH BROWSER, which opens your system browser to complete the login there instead of typing a password into the panel.
03 Your media list
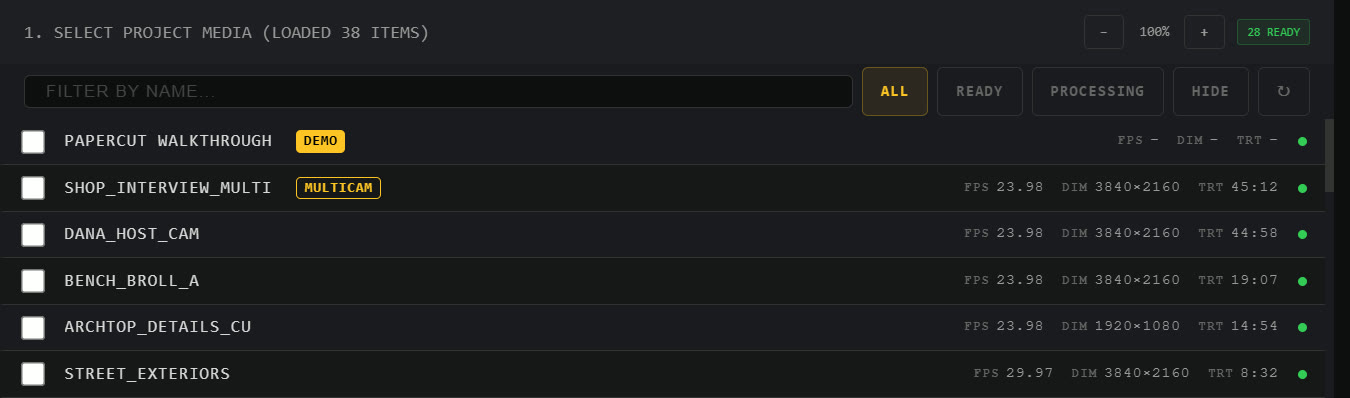
Once you're logged in and bound to a project, the panel lists the sequences from your open Premiere project. Each row has a checkbox so you can select one or several sequences at once for transcription or generation.
Filter tabs across the top narrow the list to ALL, READY (already transcribed), or PROCESSING (mid-transcription). SELECT ALL and CLEAR toggle every checkbox at once; HIDE removes rows you don't want cluttering the list without touching your Premiere project.
04 Transcribe
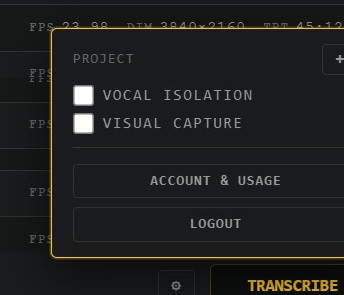
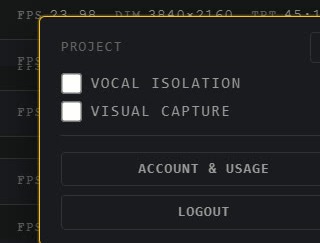
Select the sequences you want to work with, then click the gear icon to open the transcribe options popover. Two toggles live there: VOCAL ISOLATION, which cleans up dialogue before transcribing, and VISUAL CAPTURE, which builds a scene-by-scene visual log alongside the transcript. Click TRANSCRIBE to start.
Transcription runs in the background - you can keep working in Premiere while it goes. The row shows live progress until it's done. If music is detected in the audio and you didn't use vocal isolation, a MUSIC tip appears on the row - hover it, and re-transcribe with VOCAL ISOLATION turned on in the gear popover for a cleaner transcript. That's the one audio situation worth acting on; everything else is handled automatically.
If something goes wrong, you'll know. A job that fails turns the row red with RETRY and tells you why, like your trial ended, you hit a limit, or the server was busy. Fix what it says (or just wait a minute if it was busy) and transcribe it again. A row never sits on "still processing" forever.
Footage with no talking. If a sequence has no speech at all, like a b-roll reel, the row says No dialogue found (b-roll). That's not an error. It's saved as b-roll, and you can still run visual analysis on it and use it as b-roll cover.
05 The viewer card
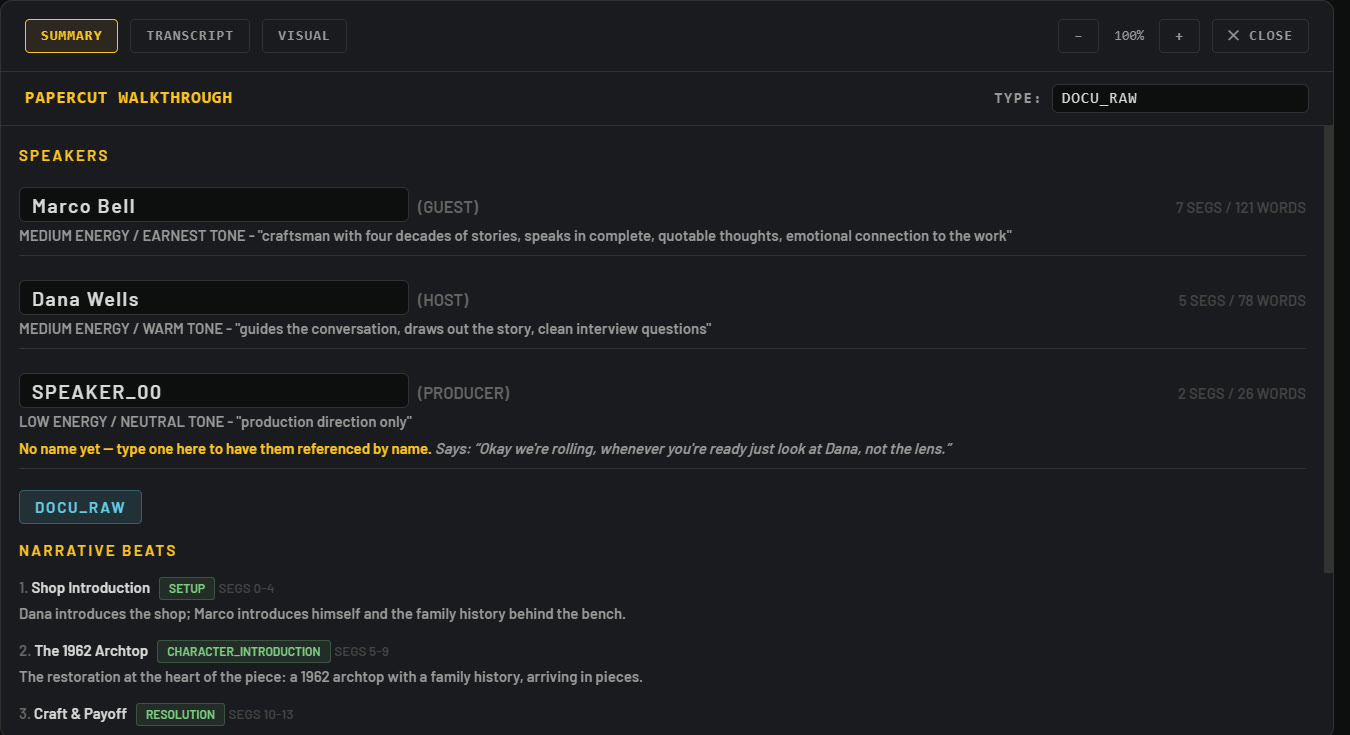
Click any transcribed row to open its viewer card. It has five tabs: SUMMARY, MAP, SPEAKERS, TRANSCRIPT and VISUAL. If your panel is narrow, the last two fold into a MORE menu. SUMMARY gives you a narrative summary and the key moments - good for getting oriented before you start cutting. MAP shows the whole source as a timeline (more on that in the next section).
Make SPEAKERS your first stop before generating anything. Check that every speaker is named right and fill in any that came back unlabeled - you can type straight into the name fields. The name picker only suggests people from the project you have open, so names from your other projects won't show up. Papercut AI labels every line of every script by speaker name, and the chat talks about your footage using those same names, so a minute spent fixing "SPEAKER_02" to "Sam" here pays off in everything that follows.
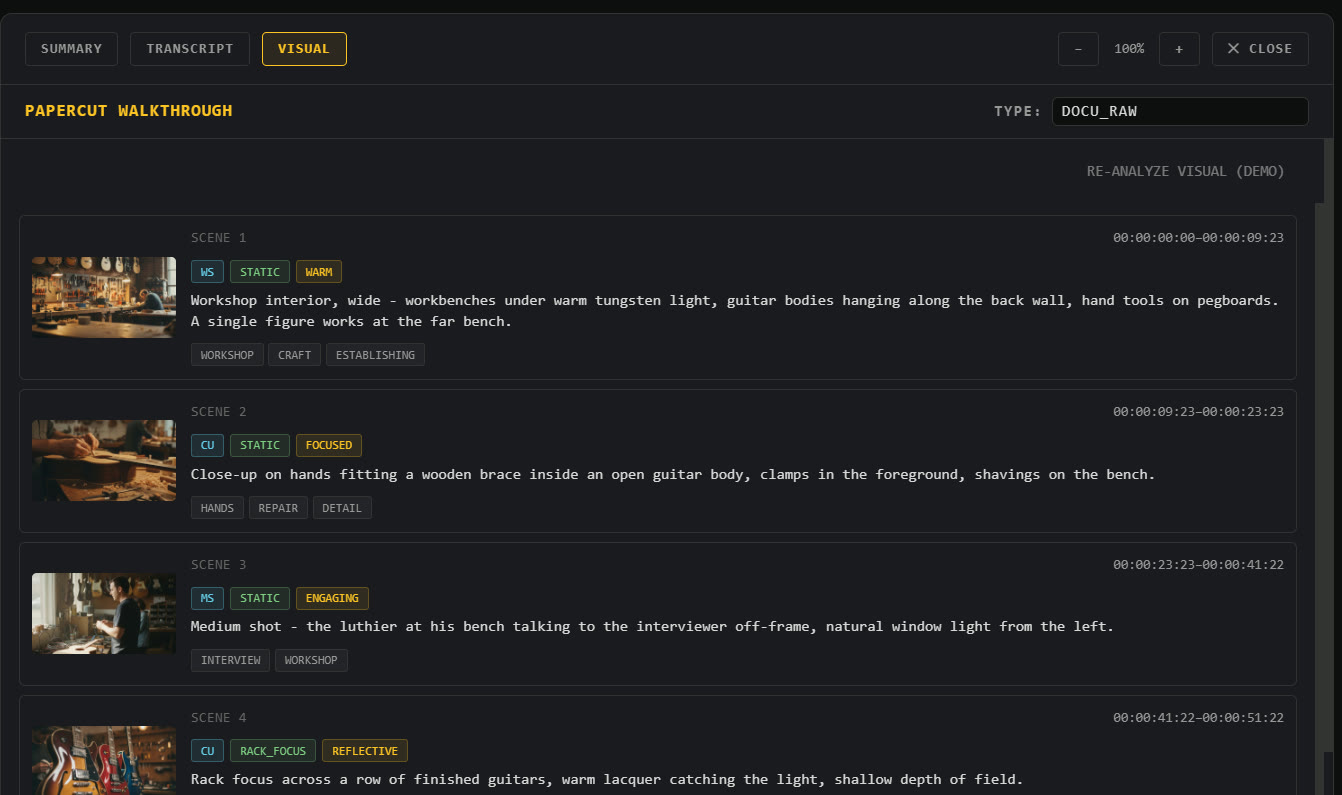
The TRANSCRIPT tab shows the full word-level transcript. The VISUAL tab shows the shot-by-shot visual analysis if you ran Visual Capture, or a Start Visual Analysis button if you haven't yet.
06 The MAP tab
MAP lays out your whole source as one timeline, start to finish. It's split into sections so you can see what's where at a glance: Dialog, Scene and B-Roll. Anything Papercut AI isn't sure about gets a Check flag, so you know to take a look. The numbered markers on the timeline are the story beats it found, in order.
Zoom it like a Premiere timeline. Fit shows the whole thing in the panel, pick a percentage to zoom in, or use - and + to step in and out. When you're zoomed in, scroll sideways.
Click a section or a beat number to see what it is, with its timecodes. SOURCE opens that range in your source monitor with in and out already set. MARKER jumps the sequence playhead to where it starts.
Down below, the MARKERS list has every beat and flagged section in time order. Click + ADD BEAT MARKERS and Papercut AI drops a Premiere marker on the source sequence for each story beat, so you can find them in your own timeline later.
07 Visual analysis / B-roll
Turning on Visual Capture during transcribe (see Transcribe, above) builds a shot-by-shot visual log of the footage - what's on screen and when, scene by scene. That log is what lets you find and place B-roll later, either through search or by having it available when Papercut AI builds a cut.
Sequences without Visual Capture still transcribe and generate normally; you just won't have a visual log to search against or see in the VISUAL tab.
Visual analysis is faster now. It works from the upload you already sent, so there's no second export on your machine.
B-roll cover. When Papercut AI covers dialogue with b-roll, the cover doesn't have to wait for a sentence to end. It can come in on a specific word, mid-line, and it can play a few shots back to back as a run.
08 Chat with the editor
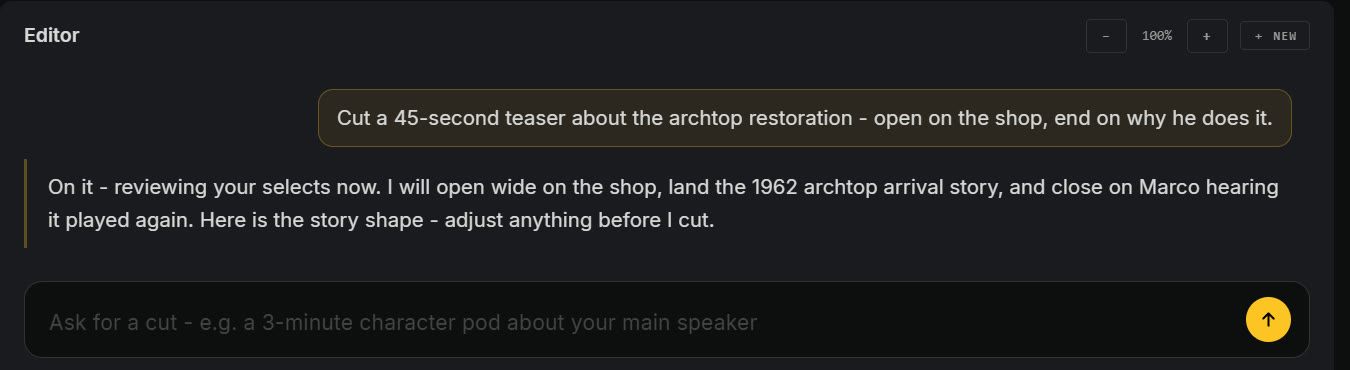
The composer at the bottom of the panel is a conversation, not a form. Describe the cut you want in plain language - what it's for, what should be in it, how it should feel.
Before generating anything, Papercut AI proposes a story outline based on what you asked for and what's actually in your footage. You review that outline before any script gets written.
The editor asks before it assumes. If your ask is ambiguous - or the footage summary doesn't include speaker names it needs - it asks you a clarifying question first, and your answer steers the outline. /quick skips all of that and just builds from your prompt as written.
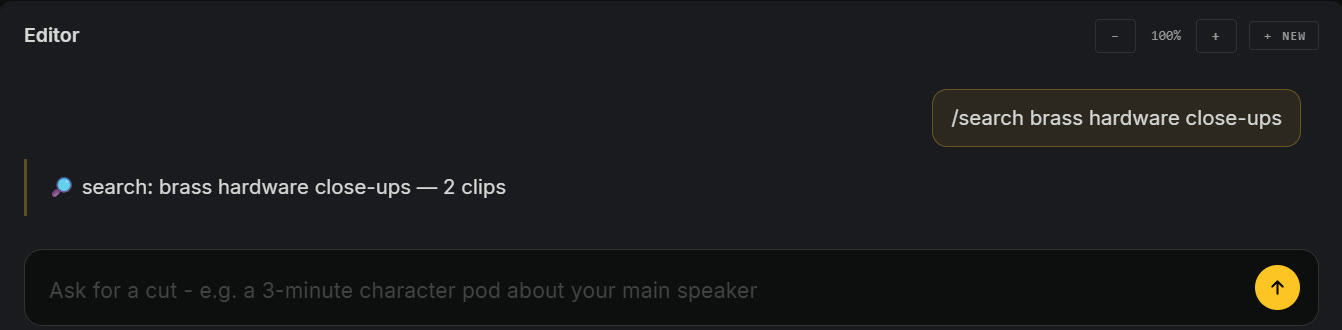
Two shortcuts live behind a / in the composer: /quick followed by your ask skips the outline conversation entirely and generates a script in one shot - fastest when you already know exactly what you want. /search followed by a query finds matching clips instead of generating anything (see Search for clips, below).
09 The outline
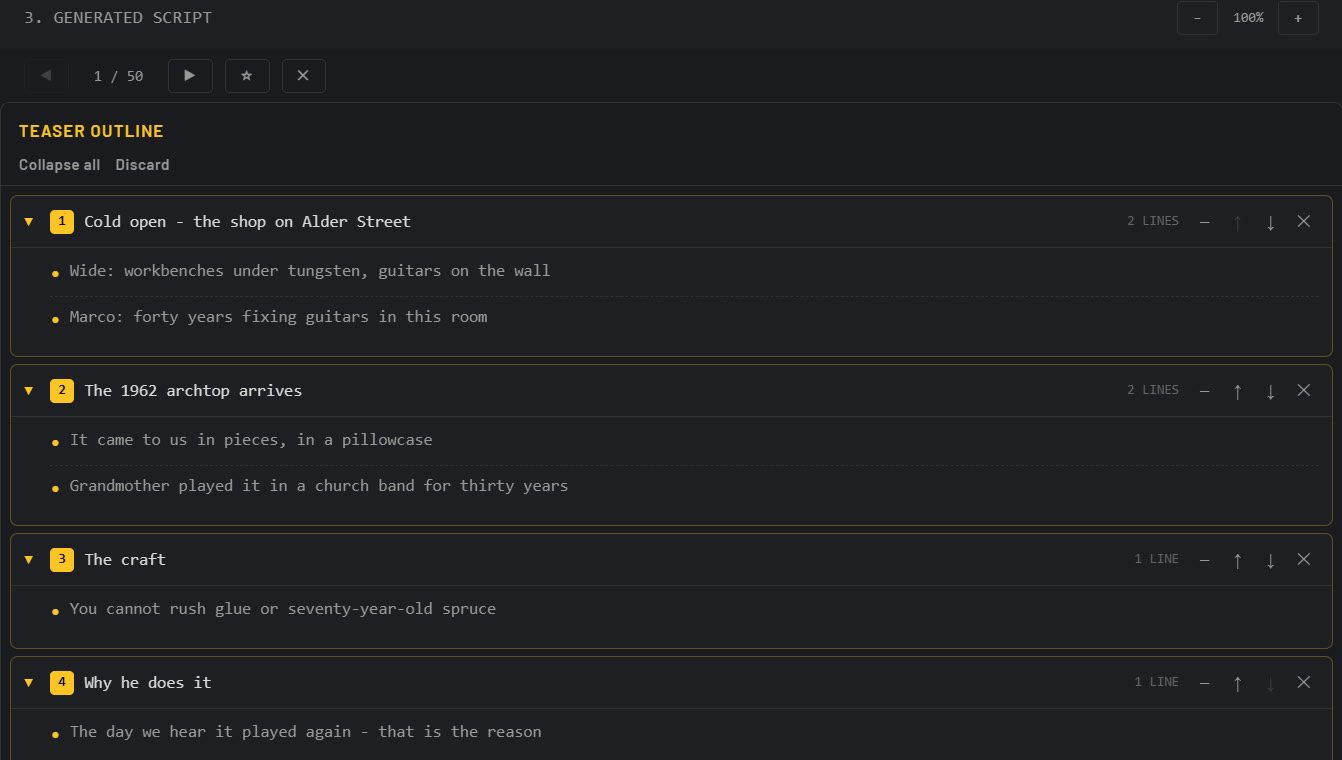
The proposed outline appears in chat as a title and a list of beats. Read through it and send follow-up notes to adjust the order, add something, or cut something - the outline updates in place until you're happy with the shape of the story. You can also click and drag beats to reorder them by hand, or click the red × to delete a beat.
The work panel next to the chat has SCRIPT and BLUEPRINT tabs. Once you generate, the finished script lives under SCRIPT; BLUEPRINT is where the outline and underlying structure live.
10 Generate
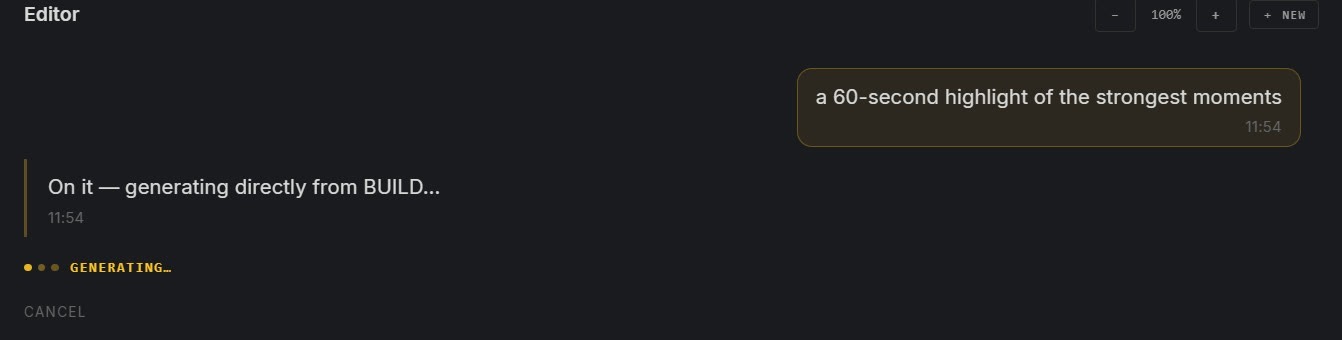
Once the outline looks right, click GENERATE. Papercut AI writes the actual script from your transcript and outline - matching real, verbatim quotes to your footage with word-level accuracy.
The finished script streams into the SCRIPT tab of the work panel as it's written.
11 Script cards
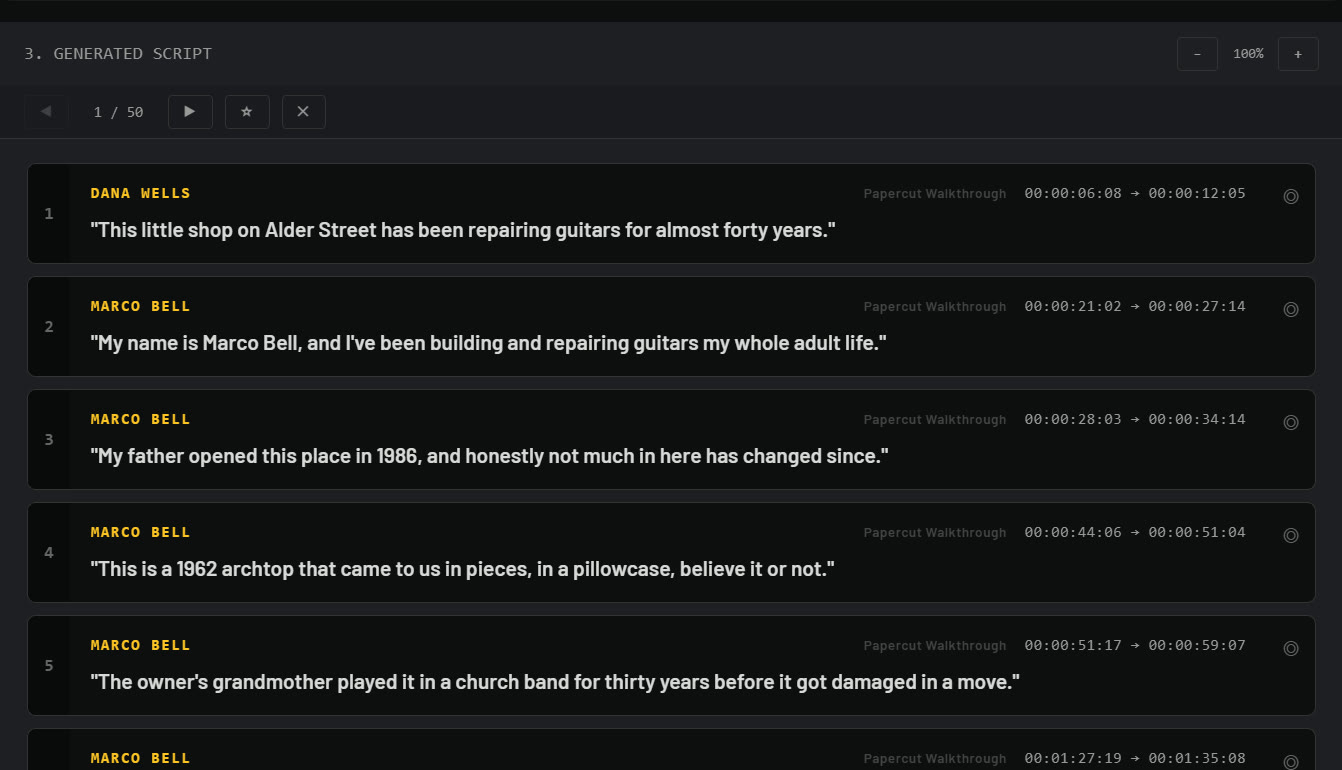
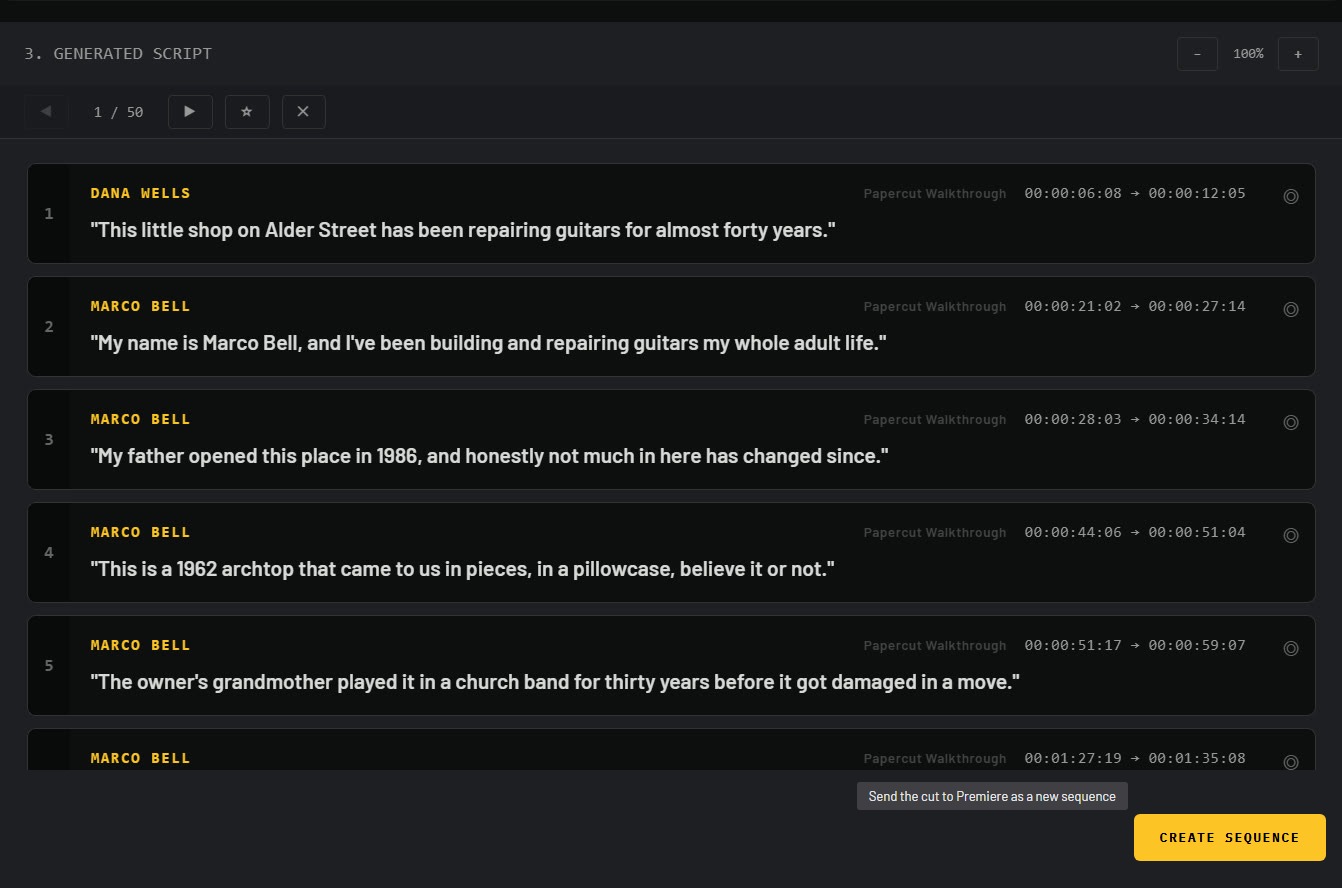
Each card in the script is one clip, with the speaker, the quoted line, and its frame-accurate source timecode. Click a card to preview that clip in your Premiere source monitor.
Drag a card's number handle to reorder it in the sequence. Click the × to remove a card you don't want.
If a line was delivered more than once on tape, the card shows a TAKE chip (for example TAKE 1/3). Click it to flip the card to another take of the same line - the quote and timecodes update to the alternate take, so you can pick the delivery you like best without leaving the panel.
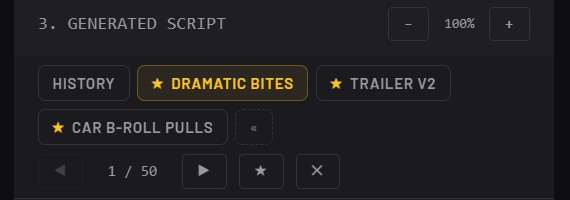
Every script you generate is kept in history - the pager at the top of the panel (for example 3/50) steps back through earlier scripts, so trying a new direction never loses the last one. Click the ★ to favorite a script you want to keep close - favoriting names it and pins it as a tab above the pager, so your keepers are one click away. Double-click a tab to rename it. Past three favorites - or whenever you collapse them with the « control - the tabs fold into a single dropdown: click it and pick the script you want.
Founder's tip
The script panel isn't just for scripts. Search for things you'll want on hand while you edit - "dramatic bites," "b-roll of the workshop," "establishing shots" - and favorite the results. Now your pull-lists live one click away, all through the polish.
12 Refine
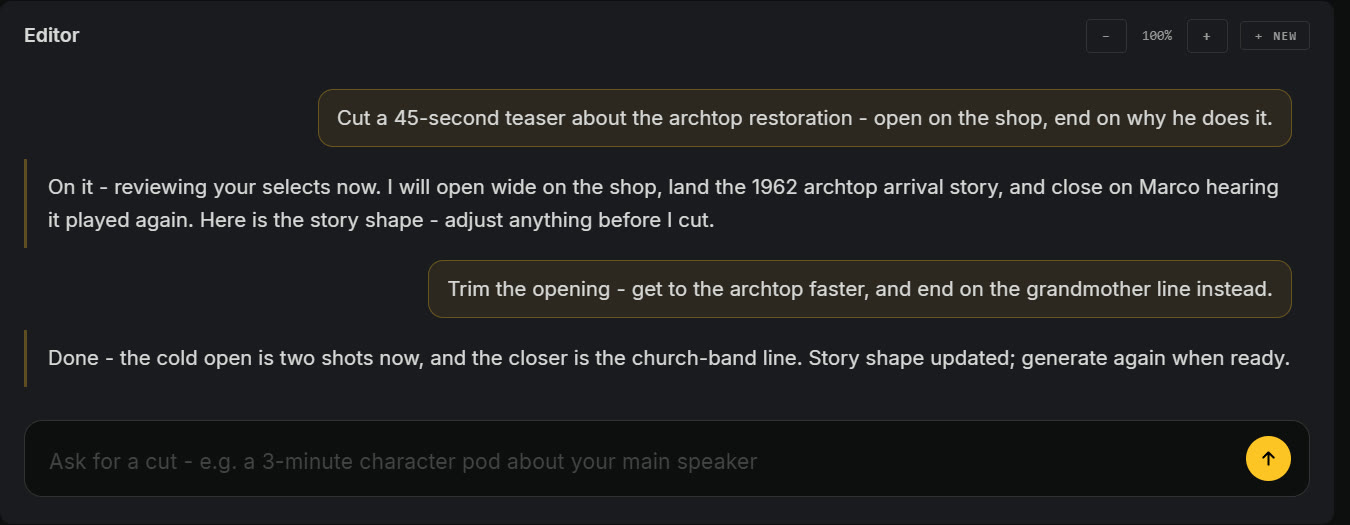
Every cut is a conversation - and refining happens right in the chat. Want changes? Type a plain-language note ("trim the opening," "cut the story about the move," "add more from Sam"), the story updates, and generating again rebuilds the cut with your direction applied.
If you have changes to make - or want to try something else - go back to the chat and ask for refinements to the existing script. Refine as many times as you need; the conversation carries your direction forward, so each pass builds on where you've already steered it. Want a clean slate instead? Hit + NEW and start fresh.
13 Search for clips
Not every ask needs a full script. Phrase your message like a search - "shots of the workshop," "close-ups of her hands" - and Papercut AI surfaces matching clips instead of generating a script. This is the fast path for finding B-roll.
Phrasing controls what comes back. "Find shots of..." searches the visual analysis and returns picture - B-roll clips with thumbnails. "Find bites of..." searches what was said and returns spoken soundbites from the transcript.
The manual version is /search followed by your query ("/search engine close-ups"). It's instant and deterministic - no AI conversation at all, just matching clips from your selected sequences.
14 Place into your timeline
When the script is ready, click CREATE SEQUENCE. Papercut AI builds a new sequence inside a Papercut Files bin in your project, with every clip placed frame-accurately at the timecodes shown on the script cards.
Dialogue audio is isolated automatically as part of this step - there's no separate toggle to remember.
Mixed formats are fine. If your selected sources have different frame rates or dimensions, every clip's timecodes resolve against its own source rate, so placement stays frame-accurate across all of them. The new sequence takes its settings from the first clip placed, and clips from other formats behave exactly as they would if you'd dropped them into that sequence yourself.
15 Settings & account
The gear popover in the panel header covers project-level and account-level settings: which project the panel is bound to (and starting a new one), general options, a link to your account and usage page, and logout.
16 Start over
Click + NEW to clear the current chat and script and start a fresh session. Your transcribed media stays put - only the conversation and generated script reset.

17 Report a bug
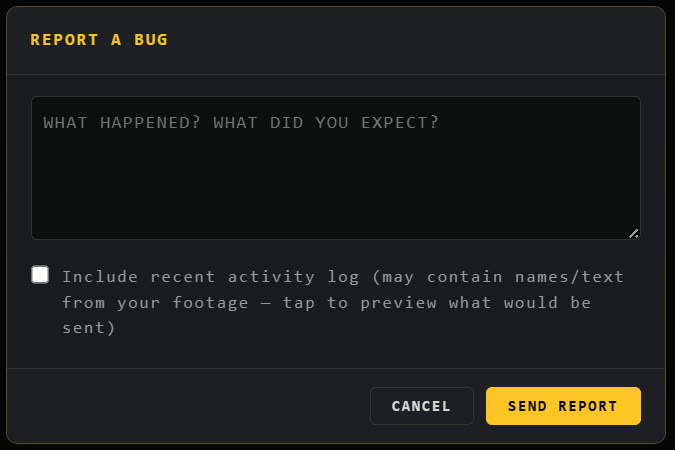
Click the ! icon in the topbar to report a problem. Describe what happened, and optionally include an activity log - you can preview exactly what it contains before sending, so you know what you're sharing.
18 Help
Click the ? icon in the topbar any time to replay the interactive walkthrough. It's the same onboarding tour you saw the first time you opened the panel.
19 Advanced
Bring your own structure. Already have a paper cut, a beat list, or a script you've been carrying around? Paste it straight into the chat. The editor builds to your structure instead of proposing its own - your order and your beats carry through to the outline and the cut. This works with /quick too: a prompt that lays out the beats you want is the fastest route to a script that follows them exactly.